Plants vs. Zombies: Family Costume Theme 2012 "Chomper"
Hello to all ~ especially those plants vs. zombies fans who happened upon this post. Each year for Halloween my two children and I take turns choosing the theme of our family Halloween costumes. This year it was my son's turn to choose. He loves the game Plants vs. Zombies and decided that was going to be our theme for this year.
Most people ask what we are going to be this year and respond with a confused look on their faces since Plants vs. Zombies is unfamiliar to them. I am sure anyone who is a Plants vs. Zombies fan will appreciate the creativity I took to make my son's idea a reality. And even those of you who are unfamiliar with the game may be impressed at the outcome.
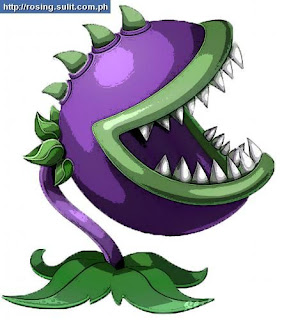
My son waned to be a Chomper. His first choice was a Pea Shooter and I actually found someone on the web who shared how they created such a costume. I thought great this will make it easy, but then a change of mind made the creating all mine. Here is what a chomper looks like:
At first I had to think of how I could get the round head of the chomper. (T)hought: Paper mache? (C)onclusion: - No probably would crumble with my luck. T - A ball is round. How about a ball? C- If I cut a ball it will just deflate. I knew that I needed some kind of opening for the mouth so it had to be two halves of a sphere. It dawned on me that I used a bowl a few years back to make my son's R2D2 costume. I decided to use two bowls to get the chomper head and open mouth.
The dollar store had decent sized Halloween bowls. I took the bowls and, with the help of my husband, positioned them like an open mouth. I duct taped the bowls in the open position. Lots of duct tape! I was relieved when it seemed to stay.
Next I took purple felt and wrapped it around the bowls starting inside the mouth and then up and around the back of the head. I wanted to cover the head in one piece of felt but the sphere shape made that very difficult. I ended up cutting the felt into two pieces, folding and tucking the felt in where it would not lay flat. I used a strip of green felt for the lips gluing half of it to the outside and folding the other half inside the mouth. (hot glue was used for felt to felt gluing. I used tacky glue on the bowl to hold the felt down). The felt being pulled tight and positioned just right where the two bowls came together helped keep the mouth open. Here is the finished product - keep reading to see how I added the details.
.jpg)
For the teeth, I glued a piece of white cardstock between two pieces of white felt. This made the teeth a little sturdier so they would not flop over. I did a similar thing for the spikes on the top of the head gluing both the spikes and teeth with hot glue. The Chomper also has spots. I didn't have purple felt so I painted white felt. Once it was dried I cut out different sized circles and hot glued them to the head.
.jpg)
.jpg)
.jpg)
I bought a purple sweat suit in the girls section (boys don't have purple clothing) for my son to wear. We had to turn the sweatshirt inside out because of the girly design on the front, but overall my son was fine with the purple "girl" outfit. He was just thrilled that his costume was going to be as authentic as possible. Plus he loved how soft the sweatpants felt.
The last thing I did was make leaves for the bottom of the chomper head and for my son's feet. I cut out slightly different sized and shaped leaves (one layer of felt) and attached them to the bottom of the bowl. The leaves at his feet are two layers of felt with a piece of cardboard in the middle to make them firm. I sewed a circular piece of elastic (that I first measured around his leg with the sweatpants on so that he can just slip the leaves on) and then sewed the two leaves to the elastic opposite each other. After trying them on, we did not like that they were still really floppy, I had to add 2 strips of cardboard to each pair of leaves to make them stick straight out.
.jpg)
.jpg) Since this post is really detailed. I will include the information on the other (much simpler) costumes in another post. Happy Costume Creating. And I will definitely make sure to post our family all dressed up. Our Halloween party is this weekend. EXCITING!!!
Since this post is really detailed. I will include the information on the other (much simpler) costumes in another post. Happy Costume Creating. And I will definitely make sure to post our family all dressed up. Our Halloween party is this weekend. EXCITING!!!
.jpg)

Most people ask what we are going to be this year and respond with a confused look on their faces since Plants vs. Zombies is unfamiliar to them. I am sure anyone who is a Plants vs. Zombies fan will appreciate the creativity I took to make my son's idea a reality. And even those of you who are unfamiliar with the game may be impressed at the outcome.
My son waned to be a Chomper. His first choice was a Pea Shooter and I actually found someone on the web who shared how they created such a costume. I thought great this will make it easy, but then a change of mind made the creating all mine. Here is what a chomper looks like:

At first I had to think of how I could get the round head of the chomper. (T)hought: Paper mache? (C)onclusion: - No probably would crumble with my luck. T - A ball is round. How about a ball? C- If I cut a ball it will just deflate. I knew that I needed some kind of opening for the mouth so it had to be two halves of a sphere. It dawned on me that I used a bowl a few years back to make my son's R2D2 costume. I decided to use two bowls to get the chomper head and open mouth.
The dollar store had decent sized Halloween bowls. I took the bowls and, with the help of my husband, positioned them like an open mouth. I duct taped the bowls in the open position. Lots of duct tape! I was relieved when it seemed to stay.
Next I took purple felt and wrapped it around the bowls starting inside the mouth and then up and around the back of the head. I wanted to cover the head in one piece of felt but the sphere shape made that very difficult. I ended up cutting the felt into two pieces, folding and tucking the felt in where it would not lay flat. I used a strip of green felt for the lips gluing half of it to the outside and folding the other half inside the mouth. (hot glue was used for felt to felt gluing. I used tacky glue on the bowl to hold the felt down). The felt being pulled tight and positioned just right where the two bowls came together helped keep the mouth open. Here is the finished product - keep reading to see how I added the details.
.jpg)
For the teeth, I glued a piece of white cardstock between two pieces of white felt. This made the teeth a little sturdier so they would not flop over. I did a similar thing for the spikes on the top of the head gluing both the spikes and teeth with hot glue. The Chomper also has spots. I didn't have purple felt so I painted white felt. Once it was dried I cut out different sized circles and hot glued them to the head.
.jpg)
.jpg)
.jpg)
I bought a purple sweat suit in the girls section (boys don't have purple clothing) for my son to wear. We had to turn the sweatshirt inside out because of the girly design on the front, but overall my son was fine with the purple "girl" outfit. He was just thrilled that his costume was going to be as authentic as possible. Plus he loved how soft the sweatpants felt.
The last thing I did was make leaves for the bottom of the chomper head and for my son's feet. I cut out slightly different sized and shaped leaves (one layer of felt) and attached them to the bottom of the bowl. The leaves at his feet are two layers of felt with a piece of cardboard in the middle to make them firm. I sewed a circular piece of elastic (that I first measured around his leg with the sweatpants on so that he can just slip the leaves on) and then sewed the two leaves to the elastic opposite each other. After trying them on, we did not like that they were still really floppy, I had to add 2 strips of cardboard to each pair of leaves to make them stick straight out.
.jpg)
.jpg)
.jpg)
Share your thoughts - I would love to know what you think.
Leslie

Just stopping by to invite you to My Wednesday Linky party. http://diycraftyprojects.com/2012/10/whatcha-work-up-wednesday-linky-party-6.html
ReplyDeleteThanks for putting up this post. The one thing I am not figuring out is how did you get the child's head inside the costume? Did you cut a hole in the bottom of the bowl? Thanks.
ReplyDeleteYes. I did cut a whole big enough to fit my son's head through. I taped the rough edges so he would not get cut!
DeleteThank you for the tutorial! We were looking at costumes on Pinterest & my son saw yours & immediately wanted to be this! I really lucked out! Thanks for doing an awesome job & making it easy for me. :) Have a great day!
ReplyDeleteWhat did you use to cut the he?
ReplyDeleteThat would be hole in the bottom of the bowl
ReplyDeleteThis comment has been removed by the author.
ReplyDeleteCompressed Games Free Download
ReplyDeletePlants vs Zombies free Download
Read more
Plants Vs Zombies Garden Warfare game Free download
Read more
plants vs zombies 2 free download
Read more
Plants vs Zombies Game of The Year
Read more
Plants vs Zombies
Read more
Garden Rescue Christmas Edition free download
Read more
Chrome Specforce Free Download Full
Download Plants vs Zombies 2 Hack Here:
ReplyDeletehttp://www.soulgaminghacks.com/plants-vs-zombies-2-hack/
http://www.soulgaminghacks.com/plants-vs-zombies-2-hack/
http://www.soulgaminghacks.com/plants-vs-zombies-2-hack/
http://www.soulgaminghacks.com/plants-vs-zombies-2-hack/
http://www.soulgaminghacks.com/plants-vs-zombies-2-hack/
Download Plants vs Zombies 2 Hacke Here:
ReplyDeletehttp://www.soulgaminghacks.com/plants-vs-zombies-2-hack/
http://www.soulgaminghacks.com/plants-vs-zombies-2-hack/
http://www.soulgaminghacks.com/plants-vs-zombies-2-hack/
http://www.soulgaminghacks.com/plants-vs-zombies-2-hack/
http://www.soulgaminghacks.com/plants-vs-zombies-2-hack/